Please note:
- The following information is only relevant for users who are not linked to Microsoft Entra ID. If you need guidance on managing users linked to Entra ID, you can find more information here.
- To create a new person and manage login credentials, the user must have the necessary permissions. This is achieved by ensuring that the user has the Profile setting for Complete rights (excluding login settings). You can learn more about this setting here.
A user's information consists of two parts: Standard details and Login settings. In Step 1 below, you will learn how to create a person with the necessary basic information, and in Step 2, you will find instructions on how to assign login credentials and a profile to enable the user to log in and start working in the system

Step 1: Create a New Person
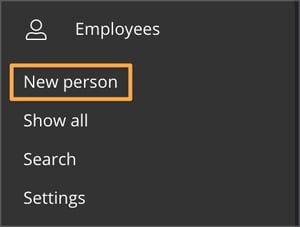
To begin creating a new person in the system, navigate to the Employees module in the main menu and click on New Person.
Fill in the required basic information, including First Name, and the appropriate Workspace. You may also include additional details such as Last Name, Department and Email for better record-keeping. Once you have completed the necessary fields, click the icon in the top left corner to Save. At this point, you have successfully created a person in the system; however, this individual is not yet a user. You can choose to maintain a comprehensive roster of all your employees in the AM System without necessarily granting them access to the system.
Proceed to Step 2 to create a user in the AM System.

💡 Tip. When you add an email address for a person, you enable this user to receive copies of notifications sent to their email. For more information, click here.
Step 2: Add Login Credentials
This step is crucial for enabling a user to log in to the system. If you possess administrative rights (meaning that the profile you belong to has the Admin Settings option enabled), you will have access to the Login Settings tab.

Username and Password
Enter the user's Username and a Password. If you would like the user to change the password you have set upon their first login, you can select the option to Force changing of password at next login
Please note: When the user changes their password, it will be validated to ensure that the new password meets specific strength requirements. The new password must be at least 8 characters long and cannot contain parts of commonly used passwords.
Profile
Next, it is time to assign the user a pre-created Profile. The Profile determines several key aspects, including:
- the administrative rights the user will possess
- the sections of the system the user will have access to (e.g., Documents, Cases)
- the actions the user can perform within Documents
- the level of access the user has to forms and cases
Valid to
You can also select a date in the Valid to field (optional) to limit the time the user is able to log in. Once the specified date has passed, the user will no longer be able to access the system. Please note that the user will still occupy a license, as this setting only restricts their login capability. Leave this field blank if you do not want to set an expiration date.
In simpler terms, it is the user's login credentials that occupy a license, since only when a person has login information are they assigned a profile that determines which modules the user can access.
For more information about licenses, click here.
Other Settings
Blocked until
 If login attempt restrictions are enabled, you can view details here about whether a user has been locked out and the duration of the lockout. As an administrator, you have the ability to unlock a blocked user before the lockout period ends by clicking the padlock icon.
Two-Factor Authentication (2FA)
If Two-Factor Authentication (2FA) is enabled in your system, you can check whether the user has activated it. As an administrator, you have the option to disable 2FA for a user if necessary, for example, if the user no longer has access to the device or application they use for 2FA. Once 2FA is disabled, the user will have the opportunity to enable it again later. For more information on how a user can activate 2FA, please refer to this article.