The system offers a wide range of field types grouped into five categories:
These fields serve as foundational components for creating a form tailored to your specific needs and requirements. Once a field has been added and selected, a blue frame will appear around it. You can then configure detailed settings for the selected field using the menu displayed in the right-hand column under the Field heading.
Below is an overview of the various properties available. Note that the settings you can adjust for a specific field depend on the type of field chosen.

Properties of Field Types
- Unique ID
Each field type has a specific ID that can be used for export functions, such as webhooks or triggers. - Column Widths
Fields in your form can have a width of 1, 2, or 3 columns, allowing for flexible layout customization. -
Required field
When a field is designated as mandatory, the individual registering a case cannot save or alter it until the field contains data. It is important to note that a field is only considered mandatory if it is visible to the user.-
If the field is concealed using the Hidden Until feature, the user can save the case even if the field lacks information.
-
If the field is Hidden or Visible through the Access function, the user cannot enter information in the field, and therefore, fields with these settings are not considered mandatory for those users.
-
-
Presented in graphs
When Presented in graphs is activated, the specific field becomes a selectable parameter when you want to create a graph from a search result or use the Charts function.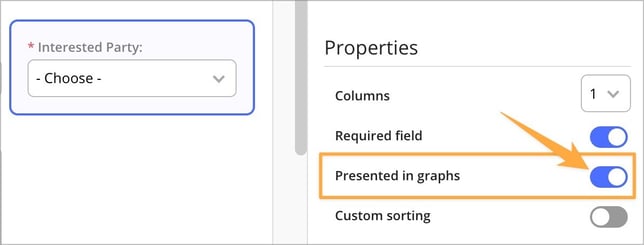
Field types that support the Presented in graphs property: Sign
Text field
Barcode
Google Maps
Email
Date
Time Number Slider Calculation
List Persons Checklist
Radiolist
Yes,No,N/A
File upload
Image upload
-
Custom Sorting
Activate Custom Sorting for fields like lists. You can manually drag and drop list items into your preferred order instead of using alphabetical order. This sorting is configured under Options. -
Options
Under the Options menu, you can:-
Create new items for a list.
-
Rename items.
-
Delete items.
-
Disable items.
- Merge multiple items into one.
-
- Link Options To
Allows you to link multiple lists so that a user’s choice in the first list determines the available options in subsequent lists.- After selecting Link Options To, a link icon appears above the field.
- Select a value in the first list, click the link icon, and associate the relevant values in the subsequent list. Repeat for all values in the first list.
Tip: Combine linked lists with the Hidden Until feature to ensure users complete fields in the correct order.
- Use Options From
If you have multiple lists in your form that should display the same selectable options, you do not need to create the options each time. This approach improves efficiency, reduces error risk, and makes it easier to keep your information up to date. By using the Use Options From feature, you can reuse values from another list.
When you activate this feature, you select which list should source its options from another. You can choose between:- a list in the current form, or
- a global list that is shared across multiple for
💡 Note:
- When a list retrieves its options using the Use Options From feature, you can no longer edit the options directly in that list—the icons for adding or removing options will be grayed out. All changes must instead be made in the source list providing the options.
- Lists, checklists, and radiolists can reference values from each other or from global lists.
- Persons lists can only source values from other person lists within the same form.
- Default Value
With the Default Value setting, you can, for example, preselect an option in a list that you want to be pre-filled when a user registers a case. However, the user can still choose a different option from the list if needed.
It is important to be cautious when using the default value function, as it may lead to users saving unintended data if they do not actively fill in the field themselves.
For example, if a user edits a section with multiple fields and only enters text in a text field before saving, a date field further down the section may have a default value automatically applied —something the user might not have noticed or intended to save.
Note: A default value is saved if:
- The field is in the section being edited.
- The editor has visibility or editing permissions for the field.
It is important to note that the default value is always saved, regardless of whether the field is hidden or visible using the Hidden Until function.
- No value has already been saved in the field (applies to all field types).
- Unit group
An unit group is a feature in Cases that allows you to connect units to numerical fields, such as number and calculation fields. It is used to display values with the correct unit, control how numbers are shown (for example decimals and thousand separators), and, if needed, convert between different units such as weight, length, time, or currency. The base unit serves as the foundation of the unit group and is used for conversions between the included units. You can find more information about unit groups in this article: Create Units for Your Forms in the Case Module.
Advanced
-
Hidden Until
The Hidden Until feature ensures users follow a structured flow by hiding specific fields or sections until one or more prerequisite fields are completed.
This feature improves data quality and ensures essential information is provided before proceeding to the next step.
Benefits:
Minimizes the risk of missing or incorrect information.
Guides users through a logical workflow, improving usability and efficiency.
-
-
Learn more about this feature in the article The Hidden until field property
-
-
Access
In the form, you can restrict authorized users’ access to specific fields, sections, groups, or repeating fields within the form.
Select the field you want to restrict access to. Then click on Access, choose Specific Profile, and configure the access settings for each profile authorized to use the form. If you select the None option, the field will be hidden from all users.
- Learn more about this feature in the article Restrict access to sections, groups, or fields in a form.
-
Done when

When using the Repeating Fields field type, youhave the option to define which fields fulfill the criteria for marking an action as complete. Once the criteria are met, the system displays a green checkmark on the repeating field that has been addressed.
This is a useful feature when a case includes multiple repeating fields managed over time.
-
Help Text
For every field created in the form, you can add a help text. Help texts are indicated by a small question mark in the top-right corner of the field. The text is displayed when the user hovers over the question mark with the mouse pointer.