The Hidden until field property
The "Hidden until" function allows selected objects to remain hidden until specific fields are completed. This guides the user to enter information in the correct sequence, reduces the likelihood of errors, and ensures accurate data collection.
Background
The Hidden until function is designed to help users navigate and follow a structured flow in Case management. By hiding specific objects until one or more fields have been completed, this feature ensures that only the necessary fields and information are displayed, increasing the likelihood that users provide the correct information in the proper order before proceeding to the next step.
Fundamentals
At its core, the Hidden until function means that an object remains invisible until a specified field (or fields) contains information. This allows you to dynamically display or hide fields and create logical workflows.

In this example, the user chooses to sign, which results in the next section of the form becoming visible.
- The Hidden until function can be applied to all field types, including Groups and Sections. This means you can hide not only individual fields until selected conditions are met, but also entire sections or groups with all their contents. By applying Hidden until to a section or group, all included fields remain hidden until the specified criteria are met.
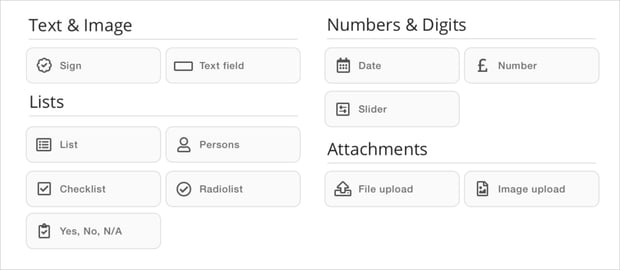
- The following field types can be used to determine whether objects should be displayed:

Note:
- The Hidden until function cannot be linked to fields within a Repeating field.
- Objects linked to the Slider field type will always be visible to the user, as this field type always has a defined value. Therefore, it is not meaningful to use the Slider field type in conjunction with the Hidden until function.
-
Fields marked as Required field are only required if they are visible to the user. If a field is hidden using the Hidden until function, the user can save the case even if the field lacks information.
How to activate the function

To activate the Hidden Until function on an object, start by selecting the object.
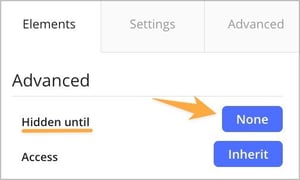
In the Elements tab, under the Advanced section, you will find the Hidden until function. Here, you will see a blue button to enable the function, which also indicates whether it has already been activated.
- If the button displays None, it means the Hidden until function is not active on the selected object.
- If you see a field name, such as Recipient, it means the function is active and linked to a field named “Recipient.”
- If it says, for example 3 fields, it means the function is active and connected to three fields. Click the button to view these fields.
Linking fields
Within the function, you can select one or more fields to control the visibility of the object by clicking on them. Fields that can be linked are shown in blue, and you can select multiple fields if desired.
If you select a field of the list type, a dialog box will appear, allowing you to specify whether the system should consider only if the list has any value or if a specific value must be selected. Further information on linking the function to specific options within lists is described below.
Viewing linked fields and removing field connections
Fields in green are currently linked to the function. Click on a green field to unlink it. For list-type fields, a dialog box will also appear, allowing you to deactivate the link by selecting Remove link.

In this example, the function is activated on the Action section and linked to the Sign field in the parent section. Then, the function is deactivated by removing the link.
Good to Know:
- When you link the Hidden until function to multiple fields, the AND logic is applied, meaning the hidden object will only become visible once all specified fields have been filled in.
- As the name suggests, Hidden until means that the field remains hidden until a condition is met. This also means that any information entered in a field that later becomes hidden will still be preserved, even if it is not visible to the user.
- An example that uses similar logic in the system is when triggers are used in Add-ons - Send Message. This means that the trigger set based on a field will execute, regardless of whether the field is hidden or visible to the user.
- A tip to avoid unintended changes in the form layout is to place hidden objects vertically beneath each other rather than horizontally side-by-side. This helps maintain a stable structure and provides a professional user experience during registration. If objects are on the same row, they may appear in the case based on their position in the form, which can create a cluttered experience and give the impression that fields are shifting around.
Linking Hidden until to specific options in lists
An eagerly awaited enhancement to the Hidden until function brings a new level of dynamism and customization to your case flows! The function can now be linked to specific options within all field types that use Lists. This means you can display selected objects when a user chooses a specific option from a list, rather than merely showing the object when the list contains any information. For those designing case flows, this update offers a substantial opportunity to refine and enhance the user experience.

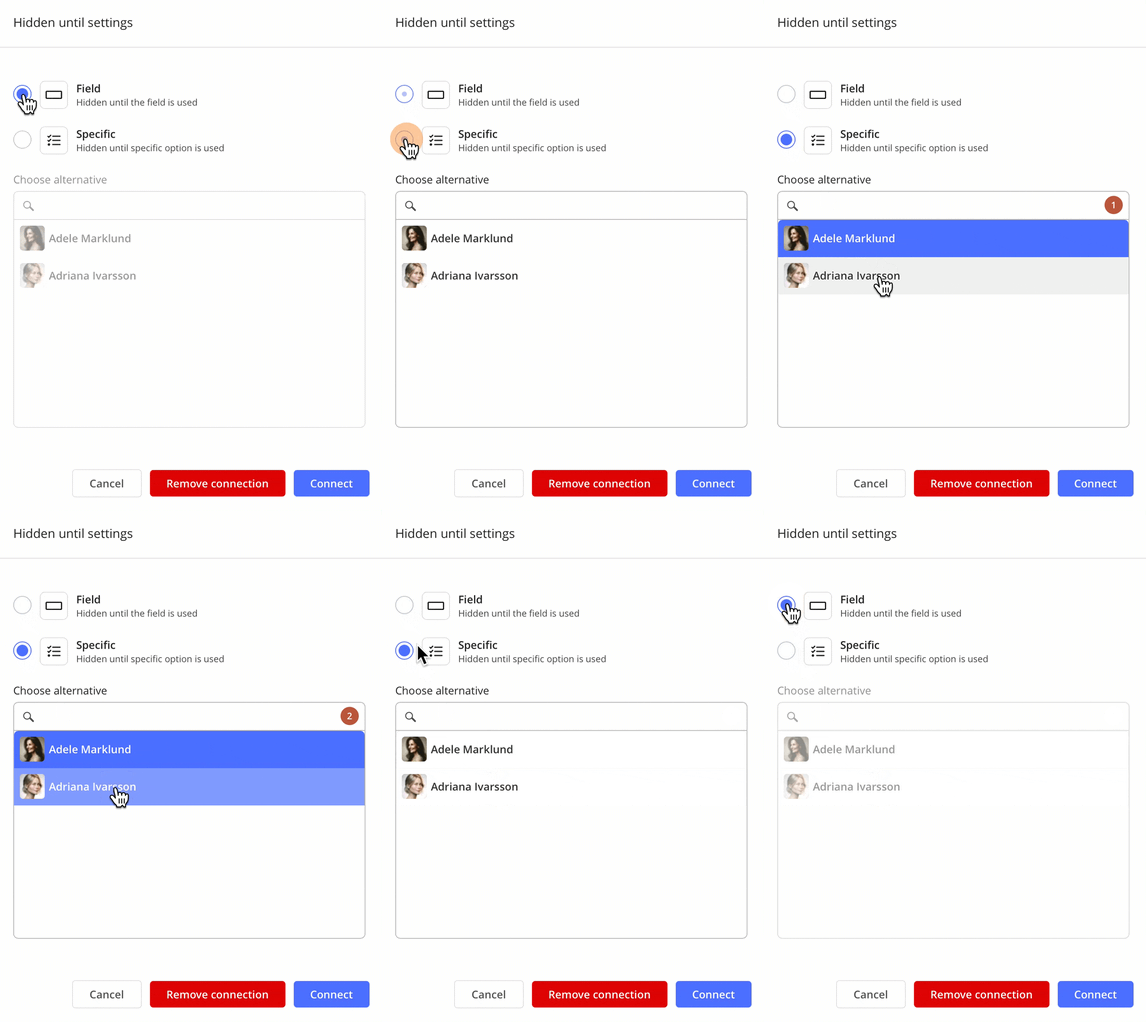
To link the Hidden until function to a specific option in a list, follow the same procedure as for other field types. Select the object you want to affect and click the blue button next to the function. When choosing a field of type List, a dialog box will open. Here, you can specify whether the system should only check if the list has any value (Field) or if a specific value must be selected (Specific).
- If you link Hidden until to multiple options within the same list, OR logic is applied between the options. This means the object will be displayed if the user selects any of the specified options. This applies to all list types except checklists.
- For Checklists, the only list type where multiple options can be selected simultaneously, you, as the form creator, can choose whether the logic should be AND or OR if you select more than one option in a checklist. This allows you to determine whether the object should only be displayed when several specific options are selected (AND logic) or when at least one of the options is chosen (OR logic).
This flexibility enables you to design more interactive and tailored forms. For example, you can hide an entire section that only appears when the user has filled in specific information or made a particular selection in a previous field. This keeps the form clean and organized while guiding the user through the process intuitively.
Things to Consider
Before the option to select specific choices within lists was available, our recommendation was to create multiple lists with only one choice. Since each list had a single option, the Hidden until function could be used to ensure a specific choice was made.
If you have existing workflows set up this way and plan to start using our new functionality, there are a few points to keep in mind. Read more in this article.
